
HandyComfy supports three ways to add a ComfyUI workflow. Choose the method that matches where the workflow currently lives.
| Method | Use it when |
|---|---|
| Workflow Hub | You want a prepared workflow that is already configured for HandyComfy. |
| ComfyUI server | The workflow is saved—or was recently run—on the connected ComfyUI server. |
| JSON file | You have exported a regular or API-format workflow JSON from ComfyUI. |
Open Workflow Management
Use either path:
Settings→Workflow Management
or:
Workflow tab→Left hamburger menu→Workflow Management icon
In Workflow Management, select the add button to open Add workflow.
Workflow Management · Add workflow
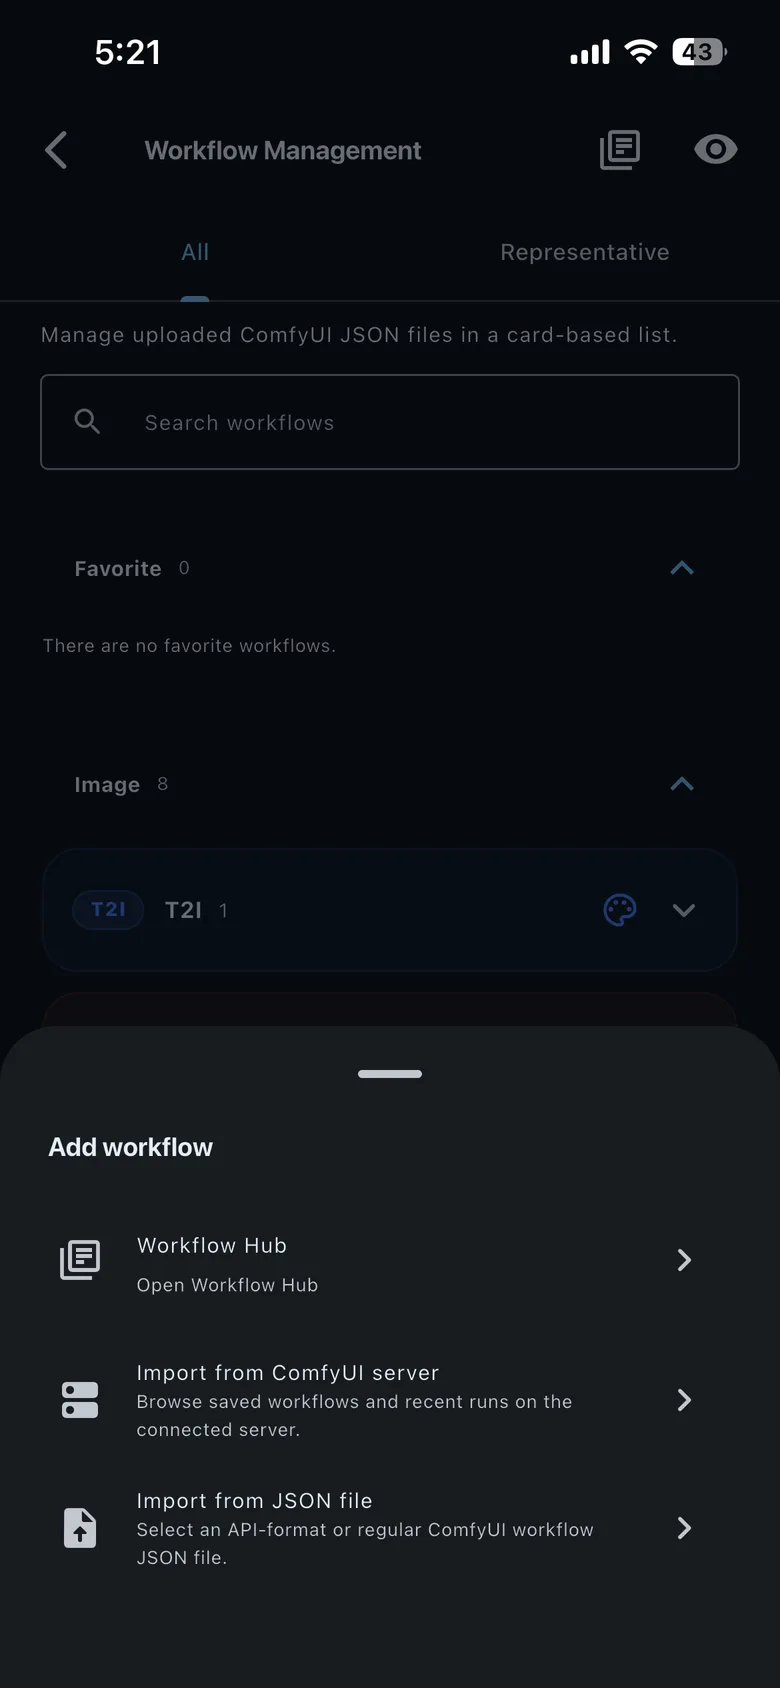
Install from Workflow Hub
Workflow Hub contains curated workflows prepared for HandyComfy. See Install a workflow from Workflow Hub for the catalog and installation steps.
Import from a connected ComfyUI server
Use this method when HandyComfy is connected to the ComfyUI server that contains the workflow.
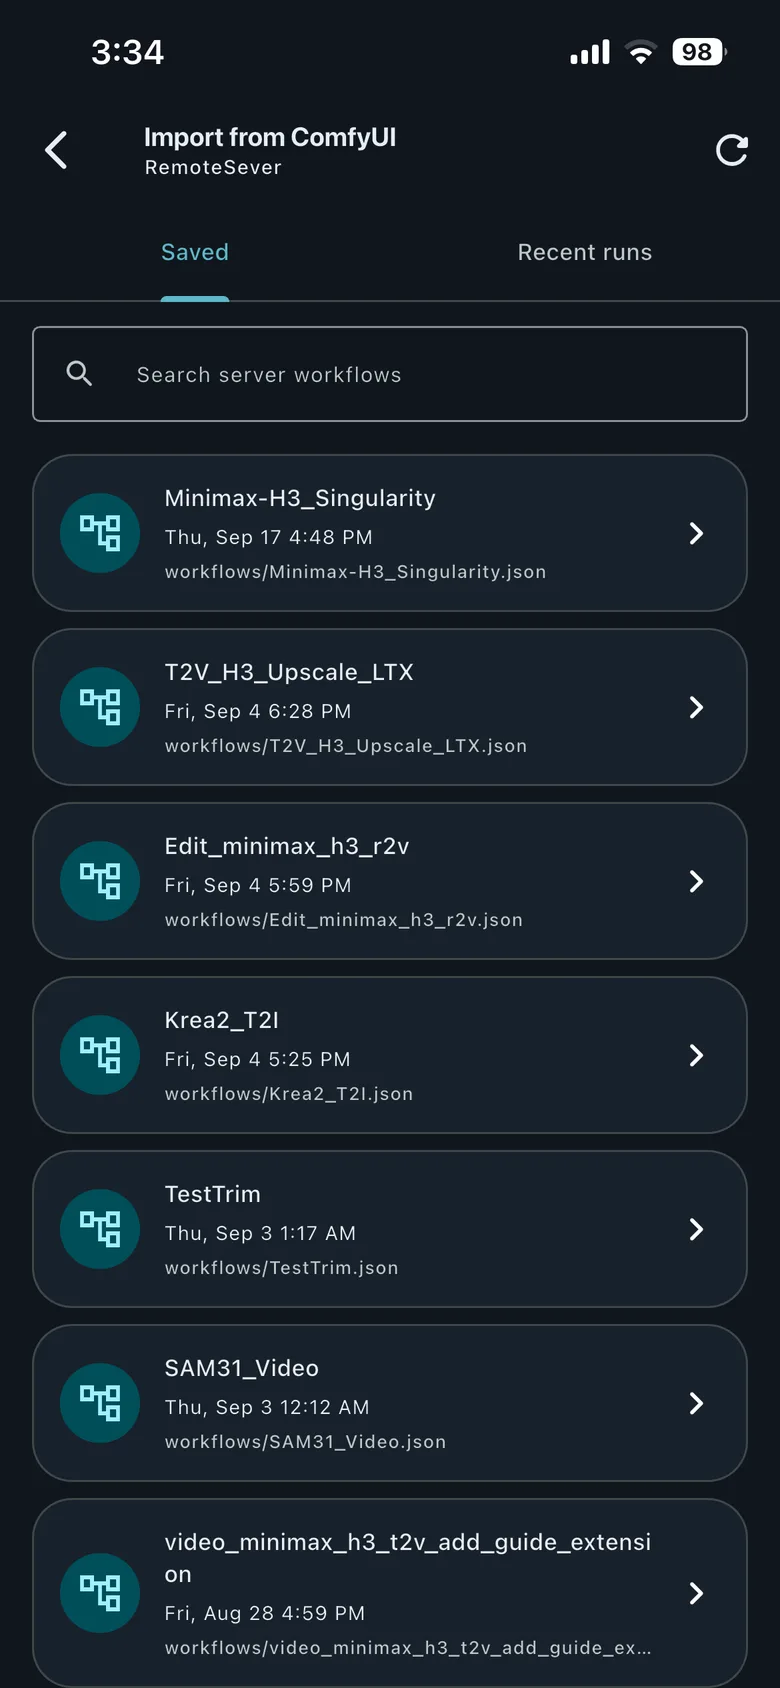
- Select Import from ComfyUI server.
- Choose Saved to browse saved server workflows or Recent runs to inspect recently executed workflows.
- Search the list if needed, then select the workflow.
- Review the compatibility analysis.
- Continue with Import workflow.
ComfyUI server · Saved and Recent runs
Some custom nodes rely on JavaScript that runs in the browser-based ComfyUI frontend. In those cases, importing directly from the server may omit information required for the workflow to work correctly in HandyComfy.
If that happens, use the recovery steps under If import or execution fails.
Import a JSON file
HandyComfy accepts both:
- regular ComfyUI workflow JSON
- API-format ComfyUI workflow JSON
Select Import from JSON file, choose the file, and review the compatibility analysis. HandyComfy can convert a regular UI workflow into API format during import when the workflow is compatible.
For the most accurate node-role detection, use an API-format JSON whose relevant nodes follow the HandyComfy Node Naming Convention.
Review compatibility
ComfyUI-server and JSON imports share a compatibility review. Before importing, check:
- whether HandyComfy reports the workflow as ready to import
- whether a regular UI workflow was converted to API format
- the node, error, and warning counts
- any compatibility diagnostics
Import · compatibility analysis
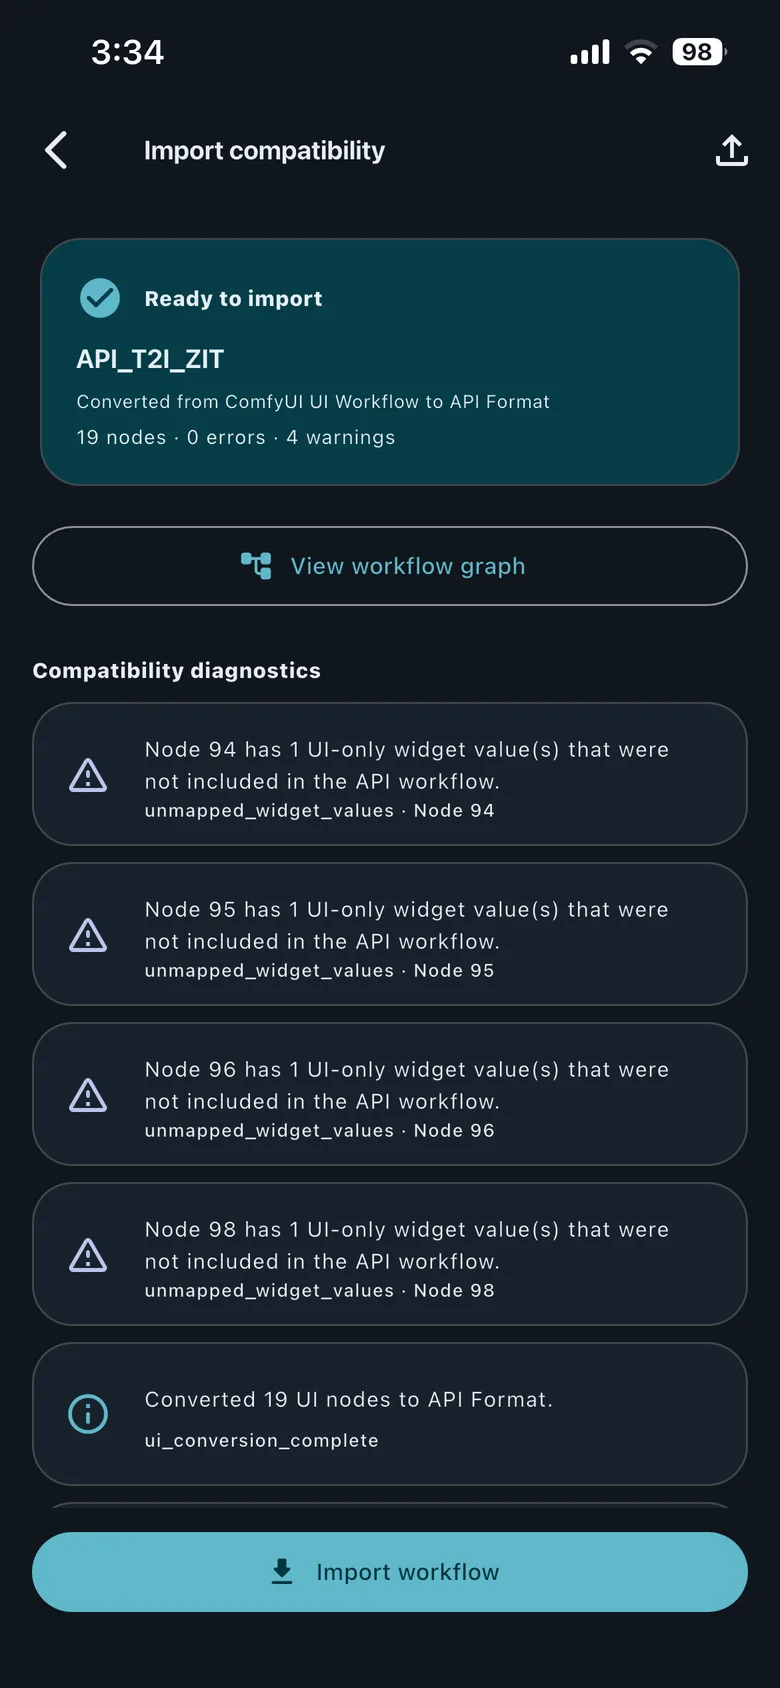
A warning does not always block import. You may continue, but missing or converted values can prevent the workflow from running correctly. A sufficiently incompatible workflow may not be importable.
Inspect the workflow graph
Select View workflow graph to inspect the nodes and connections before importing. This view helps you verify the workflow structure, but it is not a replacement for editing the workflow in ComfyUI.
Import · workflow graph
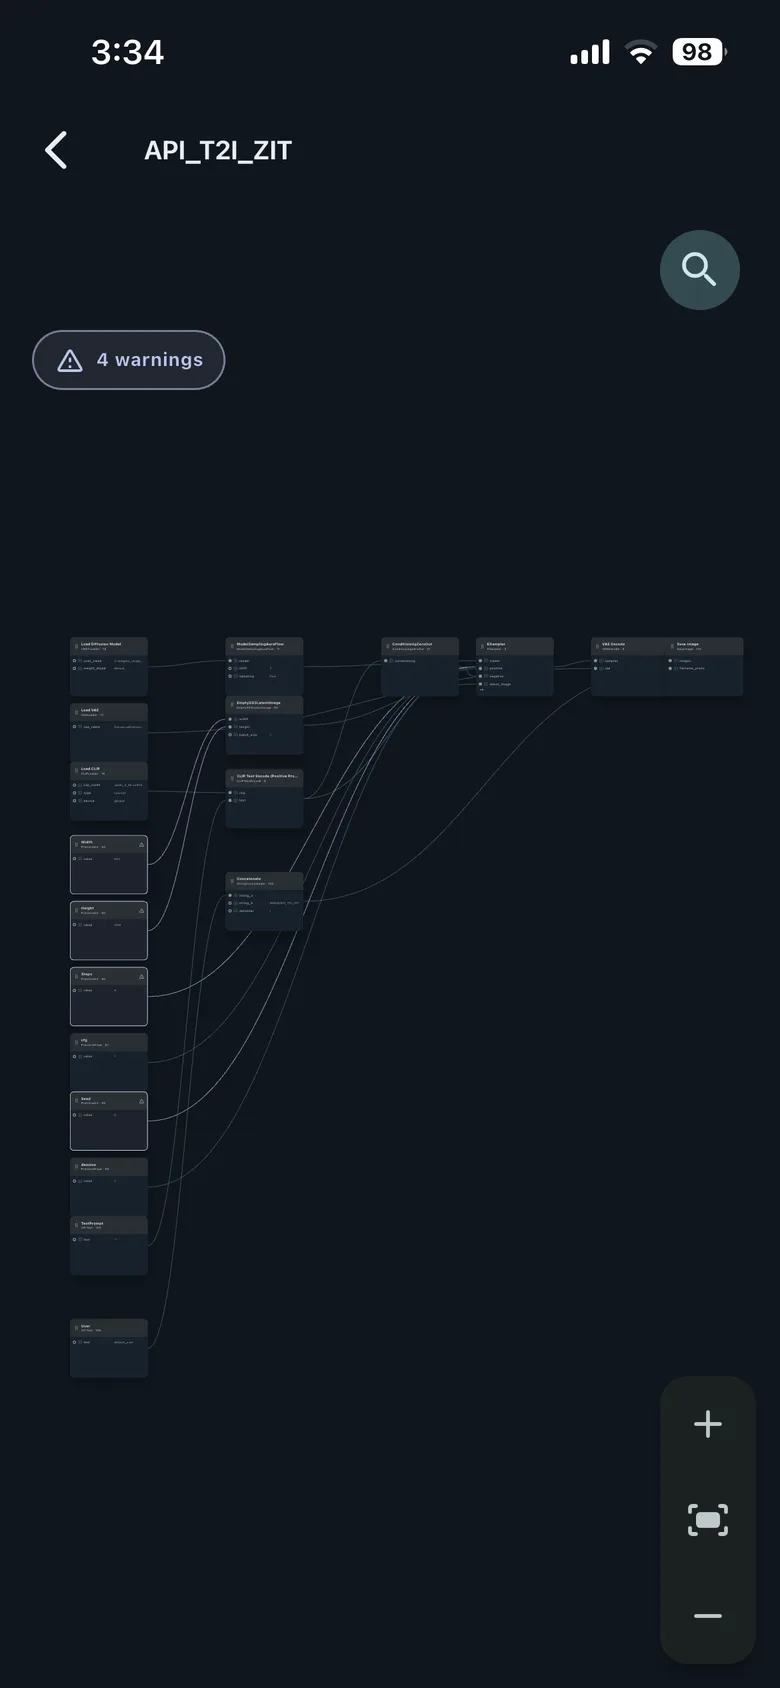
When you are ready, return to the compatibility screen and select Import workflow.
Review and save workflow information
Before saving, review these fields:
- Title: the name shown in HandyComfy
- Description: an optional explanation of the workflow
- Category: Image, Video, or Other
- Feature: the specific task, such as T2I, T2V, I2V, R2V, EDIT, EDIT(2ref), or UPSCALE
Import · workflow information
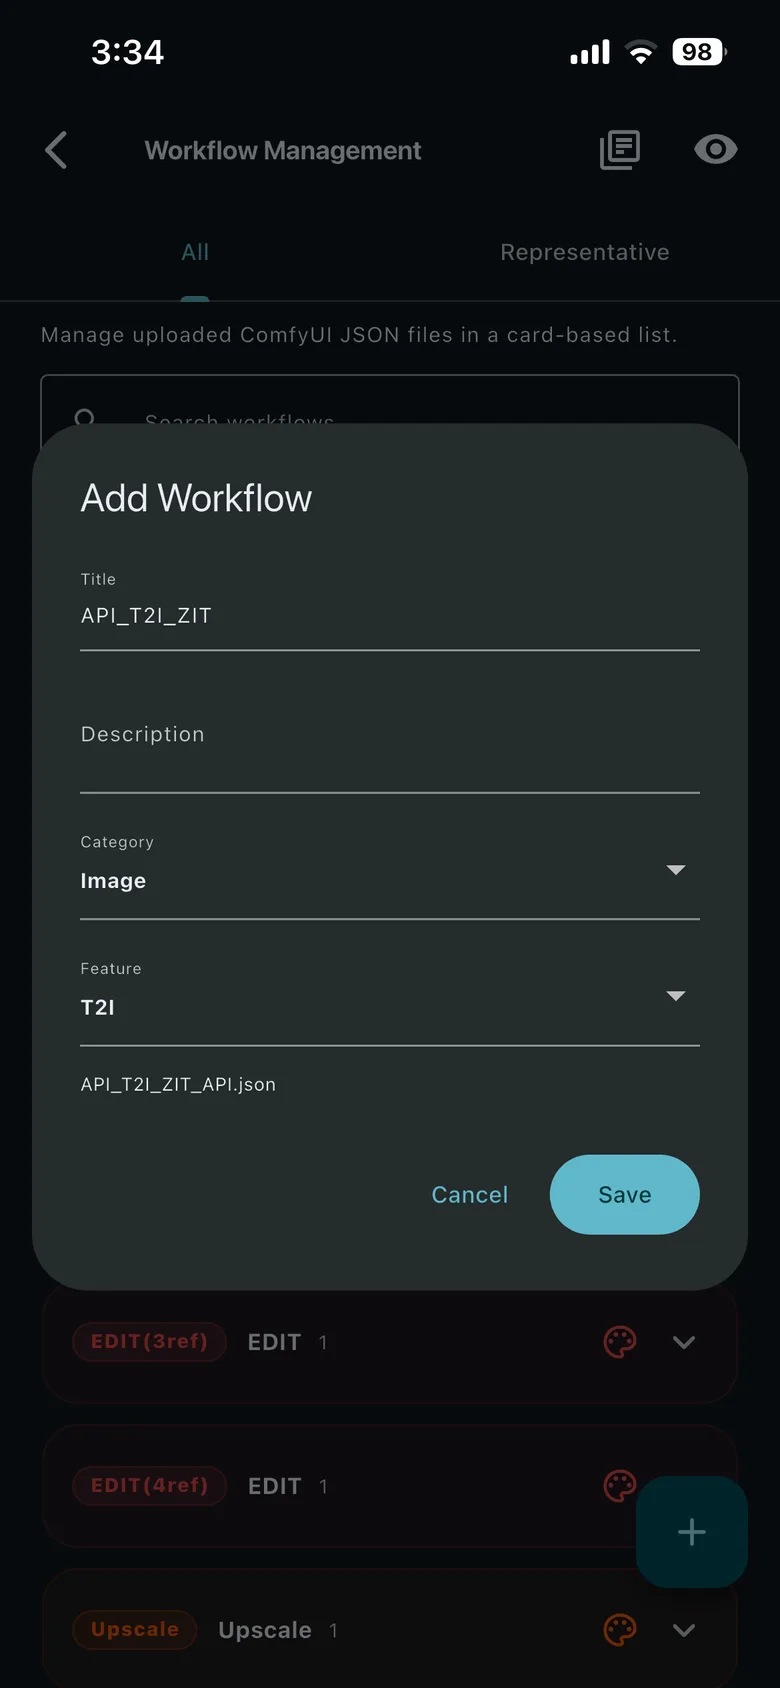
HandyComfy may suggest a Feature based on the filename. Confirm the suggestion or select the correct Feature from the dropdown. You can change the Feature again later in Workflow Management.
After you save:
- the workflow is On by default
- it becomes available in Chat and the Workflow tab
- it is not automatically assigned as a Representative workflow
To make it the default Chat recommendation for its Feature, open the Representative tab and assign it there.
If import or execution fails
If HandyComfy cannot import the workflow, or the imported workflow does not run correctly:
- Open the workflow in the browser-based ComfyUI frontend.
- Apply the HandyComfy Node Naming Convention to the nodes you want HandyComfy to identify as inputs, models, LoRAs, or other controls.
- Export the workflow in API format from ComfyUI.
- Import the exported JSON file into HandyComfy.
- Review any remaining compatibility warnings before saving.
This path is especially useful when a workflow contains custom nodes whose values depend on the ComfyUI browser frontend.